
FOOD NOTE
How to Pipe a Buttercream Basketweave Pattern
Basketweave is one of those cake decorating techniques that looks more complicated than it actually is. The overlapping strips of buttercream can seem intimidating, and many beginners assume that creating a woven effect requires advanced piping skills or years of experience. But with the right guide, you can make it yourself!
DATE
August 7, 2026
AUTHOR
ANGELA CLARE AGPAWA
READ
10 Min

How to Pipe a Basketweave Pattern with Buttercream
Before picking up a piping bag, it helps to understand what usually goes wrong.
Common Cake Piping Mistakes
One of the most common mistakes is focusing too much on the piping tip while ignoring buttercream consistency. It is easy to purchase the right tools, but it takes more effort to ensure that the frosting is neither too soft nor too stiff. The piping tip may create the design, but the buttercream determines whether that design holds.Another mistake is trying to rush through the pattern. Basketweave is made through repetition, and uneven spacing becomes more noticeable as the design grows. If you want a clean finish, your hands should be slower and steadier.
Lastly, do not worry about making every line identical. Neatness does matter, but pattern is meant to resemble woven material. Slight variations can actually make the cake look more handcrafted.
Things to prepare for basketweave cake design
The technique itself does not require a long list of specialized equipment. Prepare:- A cake covered with a smooth layer of buttercream
- Medium-stiff buttercream
- Basketweave piping tip
- Piping bag
- Cake turntable
- patula or cake scrape
For basketweave, the frosting needs enough structure to maintain defined lines but remain flexible enough to pipe smoothly. If the buttercream feels difficult to squeeze through the bag, it may be too stiff. If the lines immediately lose their shape, the frosting needs more stability.
To test quickly, pipe a small strip onto parchment paper. If the ridges remain visible and the strip holds its form, your buttercream is ready.
Prepare the cake surface
Before piping, apply an even layer of buttercream around the cake. The surface does not have to be perfectly flawless, as texture will cover much of the cake, but deep dents or uneven areas may affect how the woven pattern sits when you apply it later.
After finishing the surface, chill the cake (do not skip this step!). Having a cold and firm surface makes the piping a whole lot easier because the buttercream lines stay defined instead of sinking into the frosting underneath.
Once the cake is chilled, prepare your piping bag and practice a few lines on parchment paper first. This seemingly trivial step can save a lot of frustration; aside from testing the form of the buttercream, you are also getting used to the amount of pressure needed to create even strips.
Pipe the first vertical line
Now it's time to establish the "warp" of the basketweave, which refers to the vertical strips that will serve as the foundation of the entire pattern.Fit your piping bag with a basketweave tip, making sure the serrated edge faces outward and the smooth edge touches the cake. This is the orientation recommended by decorating brands such as Wilton, as it creates textured ribbons with a clean edge against the cake.
Here comes the crucial part: make sure not to point the piping tip straight at the surface. Instead, hold the piping bag at roughly a 45-degree angle. Starting from the top border, squeeze with even pressure while slowly lowering your hand until you reach the bottom. Do not drag the tip against the buttercream or you will mess up the surface. Allow it to lightly skim the surface as the frosting flows out, and it will naturally stick and follow.

If your lines start out thick and become thinner halfway down, the problem usually isn't the piping tip, but the inconsistent pressure. Beginners tend to instinctively squeeze harder at the beginning and relax their grip near the end. Try distributing that pressure and maintain the same grip from start to finish, letting your arm move downward naturally instead of relying only on your wrist.
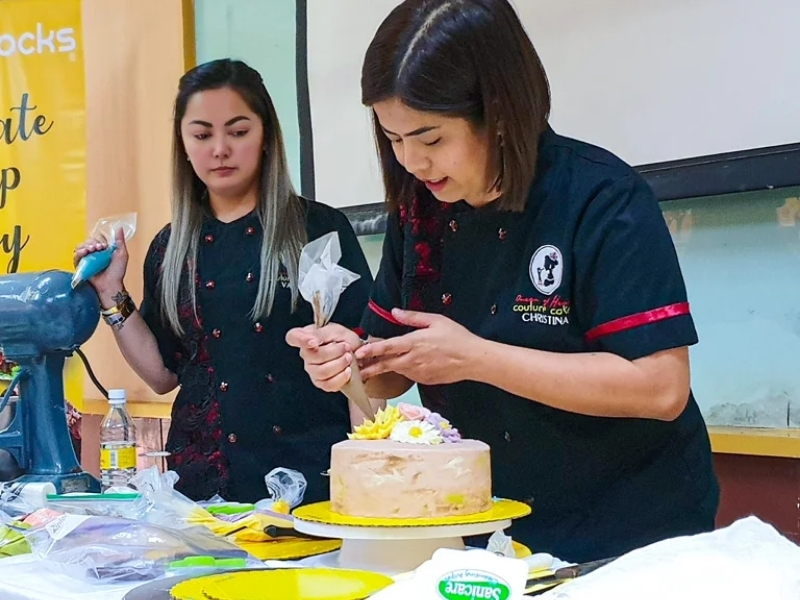
Buttercream artists Valeri and Christina, founders of Queen of Hearts Couture Cakes often remind participants in their cake-decorating classes that good piping comes not from speed, but from controlled movement.
If you prefer watching a hands-on demonstration teaching buttercream basketweave techniques that you can follow at your own pace, Valeri and Christina offer online buttercream classes spanning many different designs.
Just for basketweave alone, they teach twelve different piping techniques and five buttercream flower designs in one masterclass: the Contemporary Basketweave Piping. The masterclass is also available in English.
Create the first horizontal weave
After drawing the vertical lines in place, pipe short horizontal lines across the vertical base, leaving enough space between each strip for the pattern to remain visible. This spacing is what will give the basketweave its dimensional appearance.A common beginner mistake in this step is pulling the piping tip too quickly at the end of each strip, creating uneven tails or messy edges. Instead, reduce pressure before lifting the tip. Again, slower piping.
As you work, avoid constantly adjusting the lines after they have been placed. Buttercream is forgiving, but excessive touching can soften the texture and make the design look less defined.

Alternate the pattern
This is where the basketweave illusion comes to life: by alternating the placement of each section.After completing the first set of horizontal lines, pipe another vertical strip over their ends. The next horizontal strips should be placed in the spaces created by the previous section, giving the appearance that the buttercream is passing over and under itself.
This is the part where you may start to see that basketweave is less about complicated piping and more about rhythm.


Continue around the cake
Once the pattern is established, continue working around the cake until the desired area is covered. If you are decorating the entire side of a cake, using a turntable significantly makes the process easier.Because we are making a pattern, stepping back occasionally to look at the cake as a whole is crucial. Focusing only on the section directly in front of you is where you might make the mistake, as it may look fine at close but terrible from a distance.
Keep in mind maintaining similar spacing, pressure, and line thickness throughout the process.

The woven texture of basketweave cake designs makes it flexible to be interpreted in many creative ways. It can be turned into a floral flower basket cake, an easter basket cake, and even a partial accent weave cake. A lot of contemporary cake designs are reliant on creativity, which makes smooth piping more classic and traditional. This step-by-step guide on basketweave cake piping will allow you to put more personality and creativity into your crafts!
For more food tips, tutorials, and recommendations, subscribe to Our Market.
